
Home Page › Forums › Ask A Question › altering princess line pattern using pivot & slide
- This topic has 13 replies, 1 voice, and was last updated 5 years, 11 months ago by
stresssew.
-
AuthorPosts
-
April 25, 2016 at 6:15 PM #51494
the_professors_assistant
KeymasterHello Professor Pincushion!
I have used your pivot and slide method very successfully, on patterns which consist of a bodice and skirt. I thought I’d be extra adventurous and try to use this method on a princess line dress. Oh my goodness. I spent an entire day, adding to pattern pieces, cutting them off, trying a different tact etc with no success at all. I tried to create a bodice with darts using the princess line then using the method like it was just a normal bodice, but again no success. I ended up just making a toile and marking all over with marking pen areas to alter etc.Is it possible to use the pivot and slide method on princess seams?
Kelly 😀
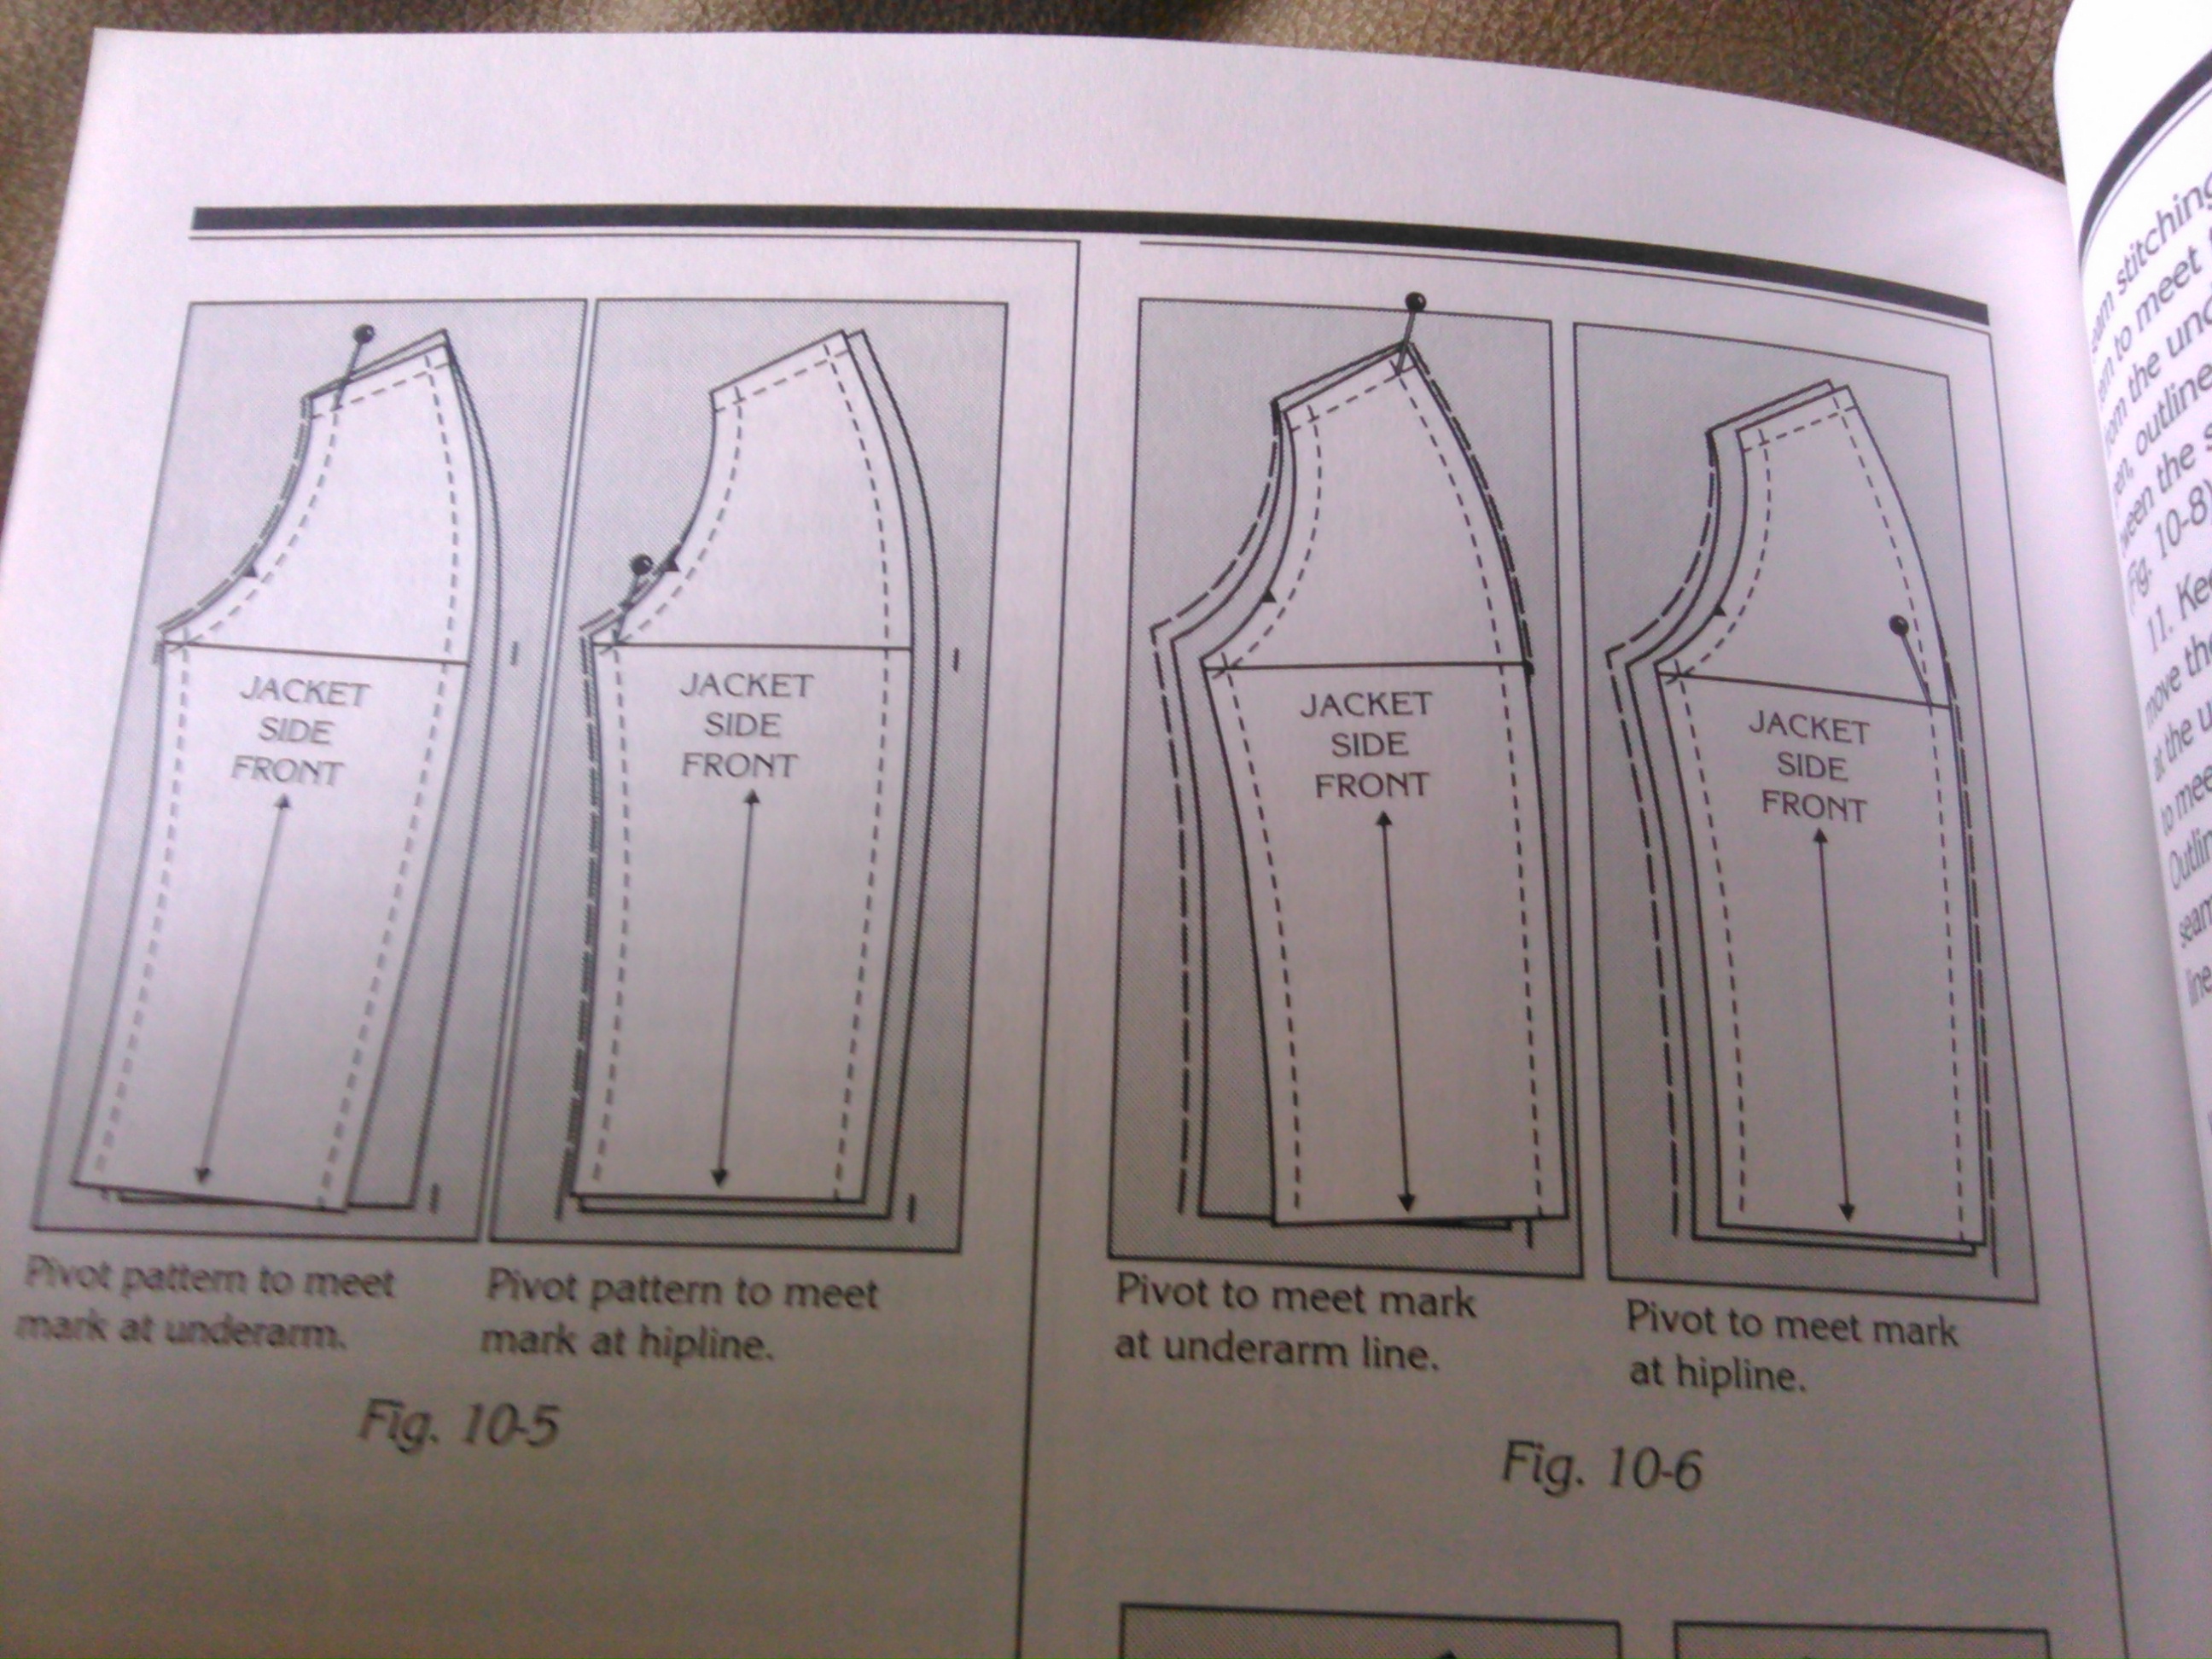
April 26, 2016 at 4:16 PM #51527KeymasterYes, you can do it. Basically, you’re taking the increase and adding to 4 pattern pieces instead of 2. Because it’s getting spread out over more pieces, you can get away with increasing by more than 4″ and not have to worry about altering the sleeve since chances are the armhole isn’t going to increase as much as with a regular bodice. So you take your difference and divide by the number of cut edges there are. So instead of taking your difference and divide by 4, chances are you’re going to be dividing by 12, because there’s 6 cut edges in the front and 6 in the back, if you have the standard center front, side fronts, center back, side backs that make up the princess bodice. I’ve attached a picture I found that shows how to do the pivot on the pieces where you’re basically adding to both sides of the pattern instead of just one side. Hope that helps for the next time! 🙂
April 26, 2016 at 4:18 PM #51529Keymasteroh and if your center front/center back has 1 side that is “place on fold” you won’t be adding on that side. You just pivot on the side that is opposite of the “place on fold” side.
May 24, 2016 at 7:56 PM #52259KeymasterHi again!
Sorry for the delay but just wanted to let you know that it all worked beautifully. I was kinda doing what you had said, however I was using the same pivot point to alter the bust, hence why I got into a bind! But it all makes sense now. Happy sewing!May 24, 2016 at 8:06 PM #52260KeymasterYay! I’m glad to hear that it worked out 🙂
May 29, 2017 at 2:13 PM #65118Anonymous
Hello – could I see the pictures that were sent on how to do this?
June 2, 2017 at 2:46 PM #65173professorpincushion
Participanthere’s the images 🙂
Attachments:
May 2, 2018 at 11:11 AM #70669Vulpeslyya
ParticipantHello,
What book is that image from? 🙂
May 6, 2018 at 4:48 PM #70733Participanthi, it’s this book: https://www.amazon.com/Busy-Womans-Fitting-Book/dp/0932086101
May 8, 2018 at 7:10 PM #70777ParticipantThanks so much!
June 21, 2019 at 9:57 PM #78564lily_99654
ParticipantHello,
Thank you for your description in the message above, of how to pivot and slide for princess seams with 4 pattern pieces. And for the picture posted further down. 🙂 My question is, what difference does making 4 adjustments per side, vs. 6, make to the garment? (8 vs. 12 total adjustments.) Does it allot more room for side boob? I’m having a hard time visualizing it.
Thank you,
Lily
June 27, 2019 at 10:34 AM #78951ParticipantThanks for your question. For me this decision is really based on the amount you want to alter. If you were increasing by just an inch, then you might want to stick with only making the alterations on the side seams because the increase isn’t a significant amount, in my opinion, to go through the work for altering all the pieces. If you’re increasing by a lot, like 4″, then yes, I think it’s best to spread the increase over all the pieces. Then you’re making smaller adjustments over many pieces and there’s less of a chance you’ll end up with your pattern pieces getting distorted due to the increase.
July 26, 2020 at 11:52 AM #89734stresssew
ParticipantHello, I realize this topic is more than 4 years old but I have some questions on it and I hope someone might be able to help!
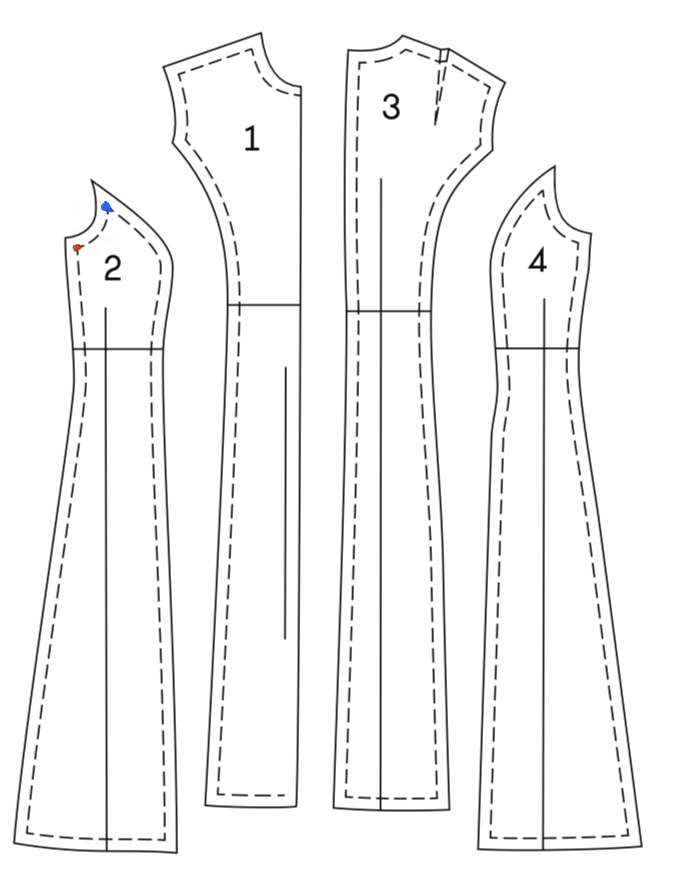
1) I’ve been following Nancy Zieman’s pivot and side method and she makes changes for 8 seams not 12. Always adding the increase to only one side of the pattern piece. Does putting the increase equally on both sides of the pattern piece not distort the grain?
2) I am working on a dress with princess seams where the seams meet at the armpit not up at the shoulder. I am confused as to where to pivot on pattern pieces 2 & 4. Has anyone used this method on this type of princess seam? Should I pivot at the red dot or the blue dot? Or both depending on where I’m adding volume?
Attachments:
July 26, 2020 at 12:01 PM #89736ParticipantHello, I realize this topic is more than 4 years old but I have some questions on it and I hope someone might be able to help!
1) I’ve been following Nancy Zieman’s pivot and slide method and she makes changes for 8 seams not 12. Always adding the increase to only one side of the pattern piece. Does putting the increase equally on both sides of the pattern piece not distort the grain?
2) I am working on a dress with princess seams where the seams meet at the armpit not up at the shoulder. I am confused as to where to pivot on pattern pieces 2 & 4. Has anyone used this method on this type of princess seam? Should I pivot at the red dot or the blue dot? Or both depending on where I’m adding volume?
Attachments:
-
AuthorPosts


- The forum ‘Ask A Question’ is closed to new topics and replies.