
 I really enjoy patternmaking and I think it's mostly because I like putting a puzzle together with my measurements and seeing if it really does work out. I also like math and pretty much that's all patternmaking is. If you went to school and thought, when am I ever going use fractions again? Well, here they are and you really have to welcome them back with open arms because, in this situation, fractions are our friends. If you have trouble with fractions, you can break them down to decimal form and it's a little easier to do the math on a calculator. Here's a cheat sheet for you. 1/8=.125, 1/4=.25, 3/8=.375, 1/2=.5, 5/8=.625, 3/4 =.75, 7/8=.875 Please make note that in patternmaking, measurements are king and it's so important to be accurate. You can't be sloppy and just round things up or down to the nearest inch. I usually do it to the nearest 1/8" but if it's easier you can do to the closest 1/4". If your lines aren't lining up the way they're supposed to, double check your measurements.
This tutorial is part of a series for creating a full bodice block or sloper so you can create a bodice pattern. This pattern can be used to be paired with a skirt to create a dress or we can use the block to create different styles and even make tops from it. Please realize this pattern is meant for woven fabrics only. If you want to use knit fabric, check out our basic tank top or tshirt bodice tutorial.
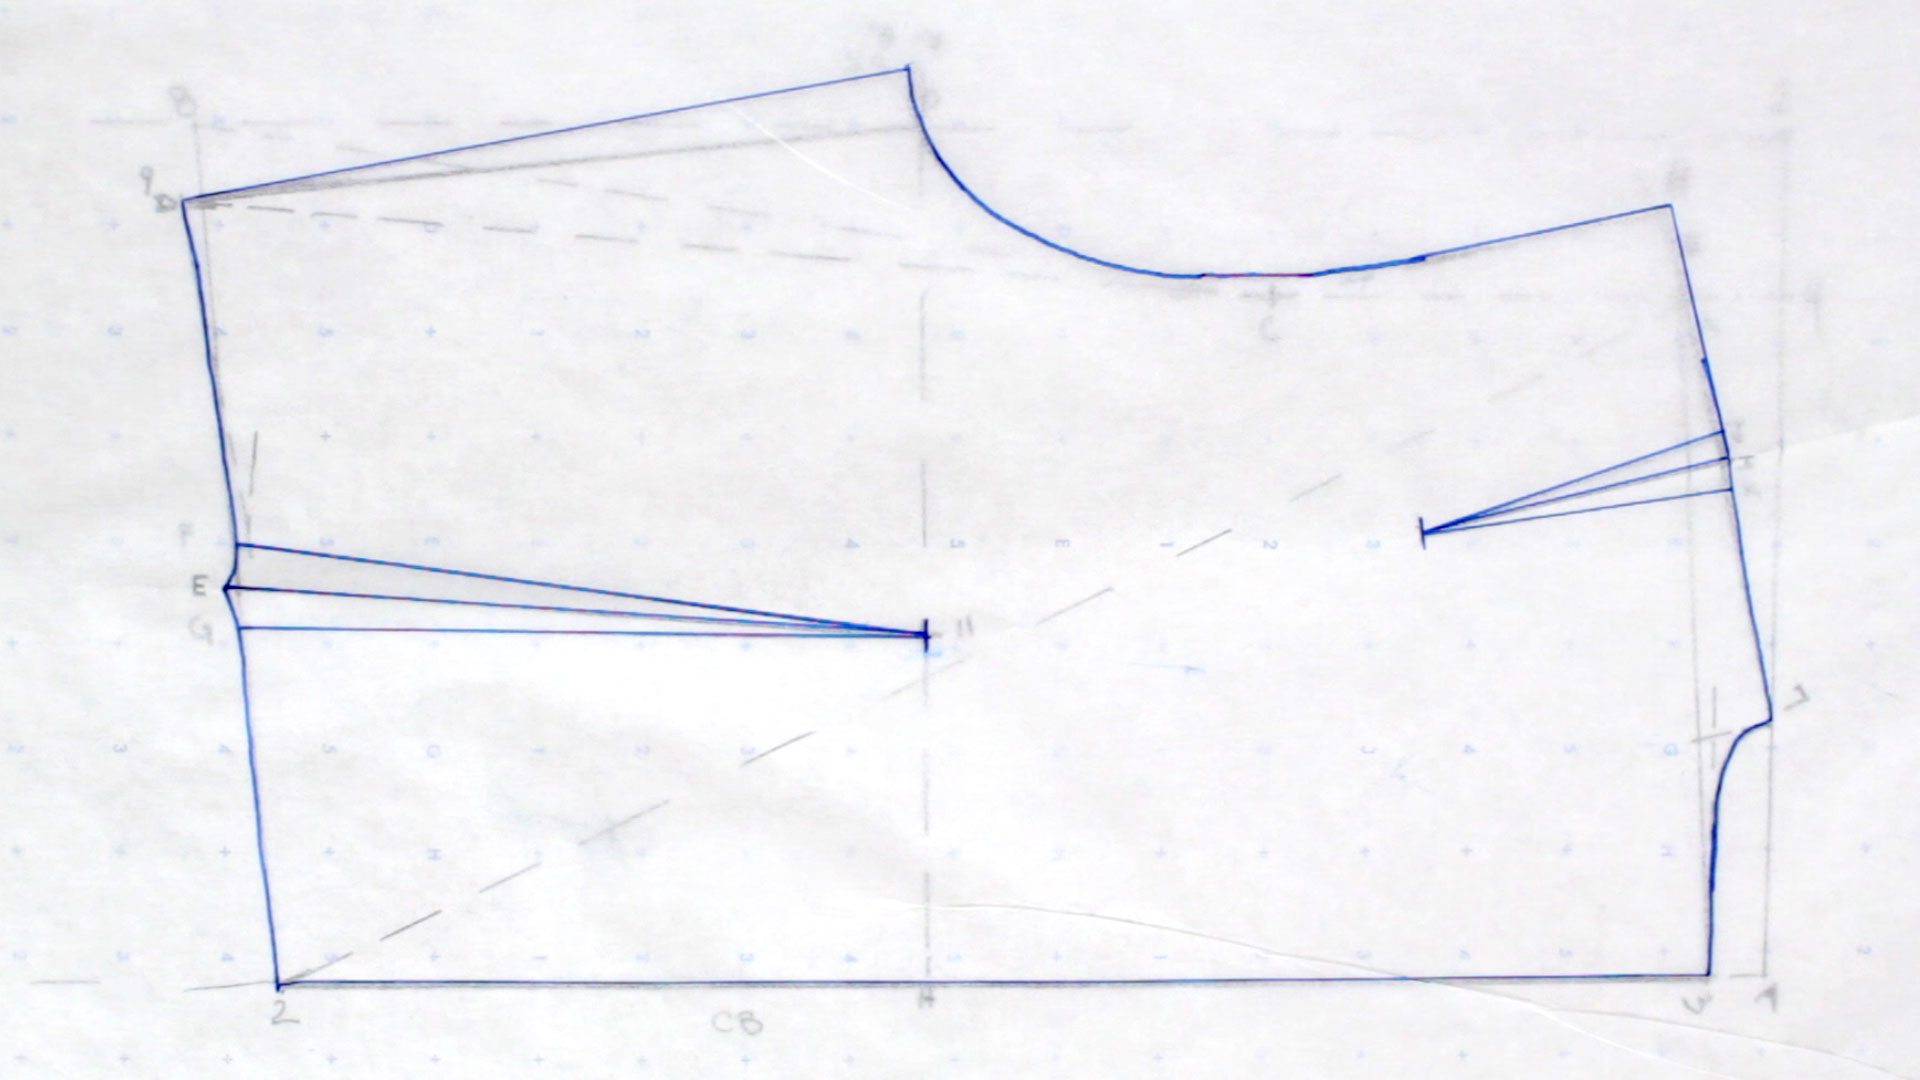
Because this patternmaking is a little more involved and uses quite a few measurements, we decided to break up this block into separate tutorials. This particular one covers back body measurements and drafting the back bodice only. I definitely recommend doing the front bodice first. Following this one, you can then tackle the back bodice. At the end of this tutorial, I go over how to true up your pattern pieces.

yes, you can use calico instead of muslin. The drafting includes functional ease so when you’re done you should feel comfortable and be able to move in it. After you make your muslin, you can decide if you want to add a bit more as design ease and make it a bit looser. good luck! 🙂
Sorry I have another question. Can I use calico instead of muslin. I cannot find muslin in large amounts. It seems to be only used for sieving.
Thanks for your help.
Hi, I am planning on making my own patterns and you have explained how to make the block pattern so well I am confident to get started. My only worry is that if I take my exact measurements there will be no room to move within the garment. I want the garment to fit but to be comfortable. Do I make the block first for body shape and decide how loose I want it later?
Hope that makes sense….
Looking at the drafts, the back armhole is longer, but, when sewn together, it’s not like the back armhole is going to look like it’s hanging lower than the front. Instead, you’re matching up the shoulder seam and the underarm seam. What happens is that the back armhole then has a little more circumference or a little more roomy in the back than the front. This may be because I have more back fat then front fat near my arm…I don’t like to think about it, because it makes me cry. haha! 😉 I wouldn’t worry about it, until you try on your muslin, to see if there’s an actual problem. When mine is created, my armholes fit perfectly so this discrepancy was right on the money. 😀
What make the back armhole
longer than the front?